ASSEMBLING INSTRUCTIONS
DUOPLUG
®
To guarantee optimum results and safe operation of our
DUOPLUG
®
system, please follow the instructions below carefully.
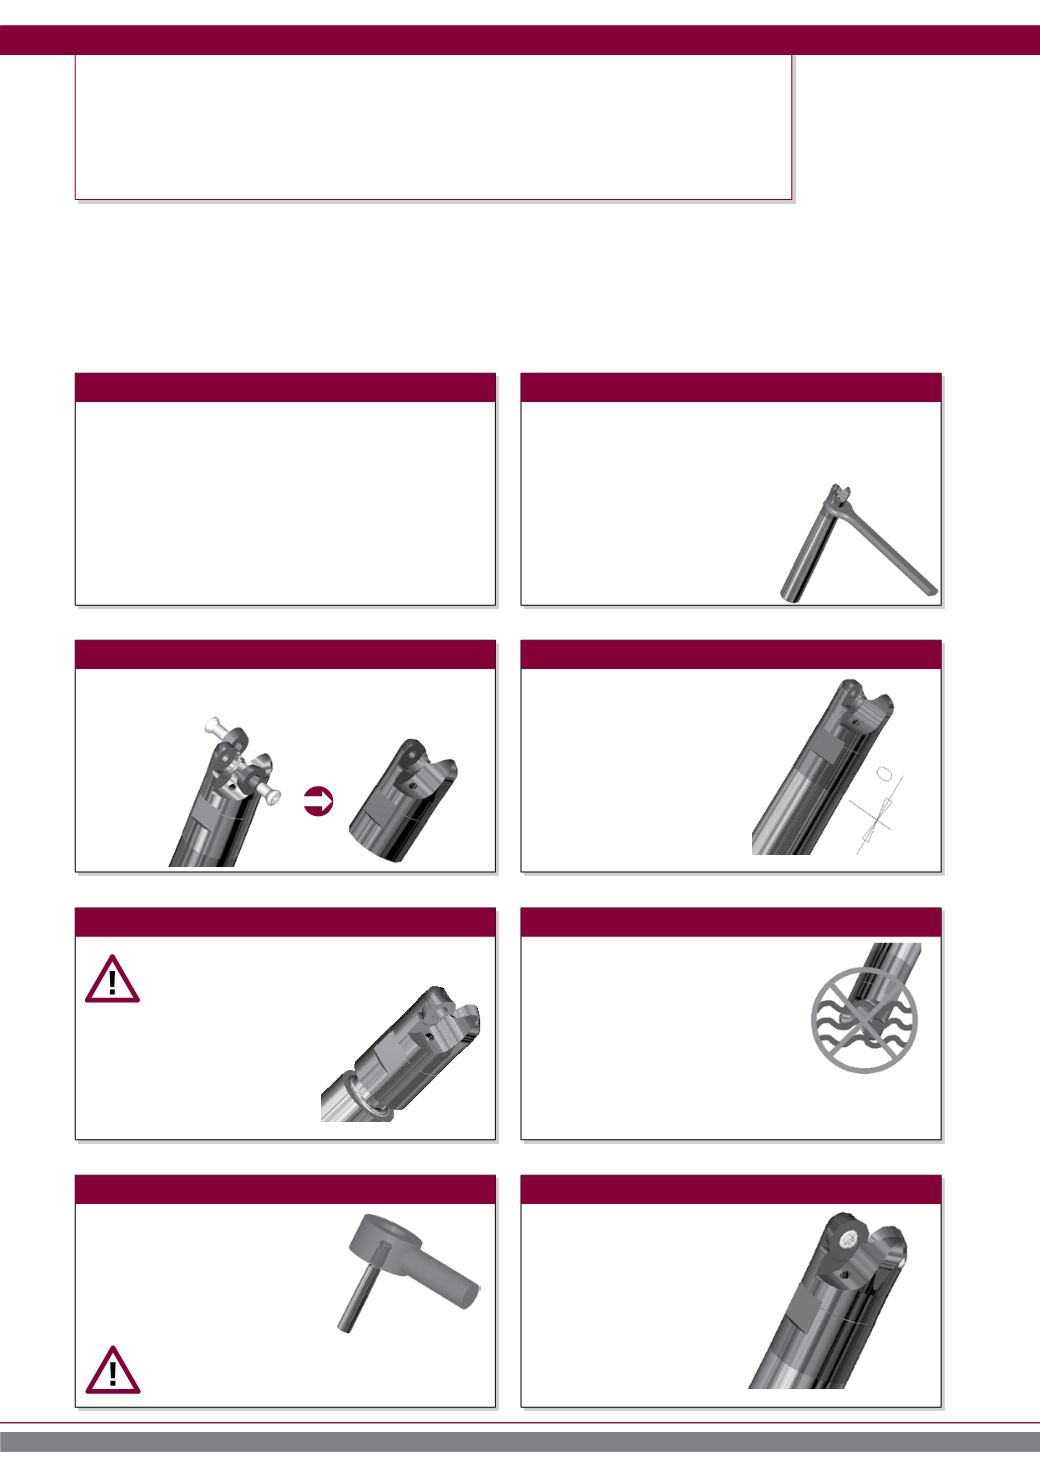
Assembling:
Preparations
Step 1
Step 2
Step 3
Step 4
Step 5
Step 6
Step 7
Get all the accessories and equipment ready at the
workstation before starting heating procedure!
(appropriate spanner, safety glasses, protective gloves)
Heat this connection now with the
Pokolm Inductive Shrinking Unit
for 6 to 15 seconds, depending on
diameter, then start Step 4 imme-
diately.
Do not shock cool your shrunk combination;
use the cooling equipment of your
Shrinking Unit to cool it evenly.
During cooling, the
DUOPLUG
®
cutter
body contracts and you get a safe load
transmission.
Perform these steps with
only moderate strength.
Remove inserts and their screws from the milling cutter
body.
Attention: All surfaces carrying special
fits must be absolutely grease-free and
dust-free. Please screw the
DUO-
PLUG
®
milling cutter body onto the
DUO-
PLUG
®
adaptor by hand up to the fit
zone. Do not use a tool or too much
strength.
Attention: Adaptor and milling
cutter body are very hot
after this process! Danger of burning hands or
fingers! Protective gloves MUST be worn!
Inductive heating expands the fitted bore in the cutter
body. Only then can you totally screw the body onto the
end face of your adaptor with the appropriate spanner.
This step must be possible without using
too much strength.If there is still some
resistance, please heat the
DUOPLUG
®
cutter body once more for a few sec-
onds and try again.
Make sure that the body and adaptor
fit together perfectly. There should be
no gap.
Mount the desired inserts onto
the body with their screws. Af-
ter checking the diameter and
length of your tool, you can start
your operation.
Assembling instructions - DuoPlug - assembly
216


