ASSEMBLING INSTRUCTIONS
Set-screw for shell type milling cutter bodies diam. 40 up to 52 mm
In order to maintain optimum and safe use of these tools, you should pay attention to following notice if you assemble set-
screws GWSTPS81SK:
Assembling set-screw:
Step 1
Step 2
Step 3
Step 4
Screw set-screw into cutter body up to limit-stop
contact. This is guaranteed for every tool in Pokolm's
warehouse. In rare exceptional cases, this set-screw
can become unfastened during transport. In that case,
the set-screw has to be re-adjusted prior to usage.
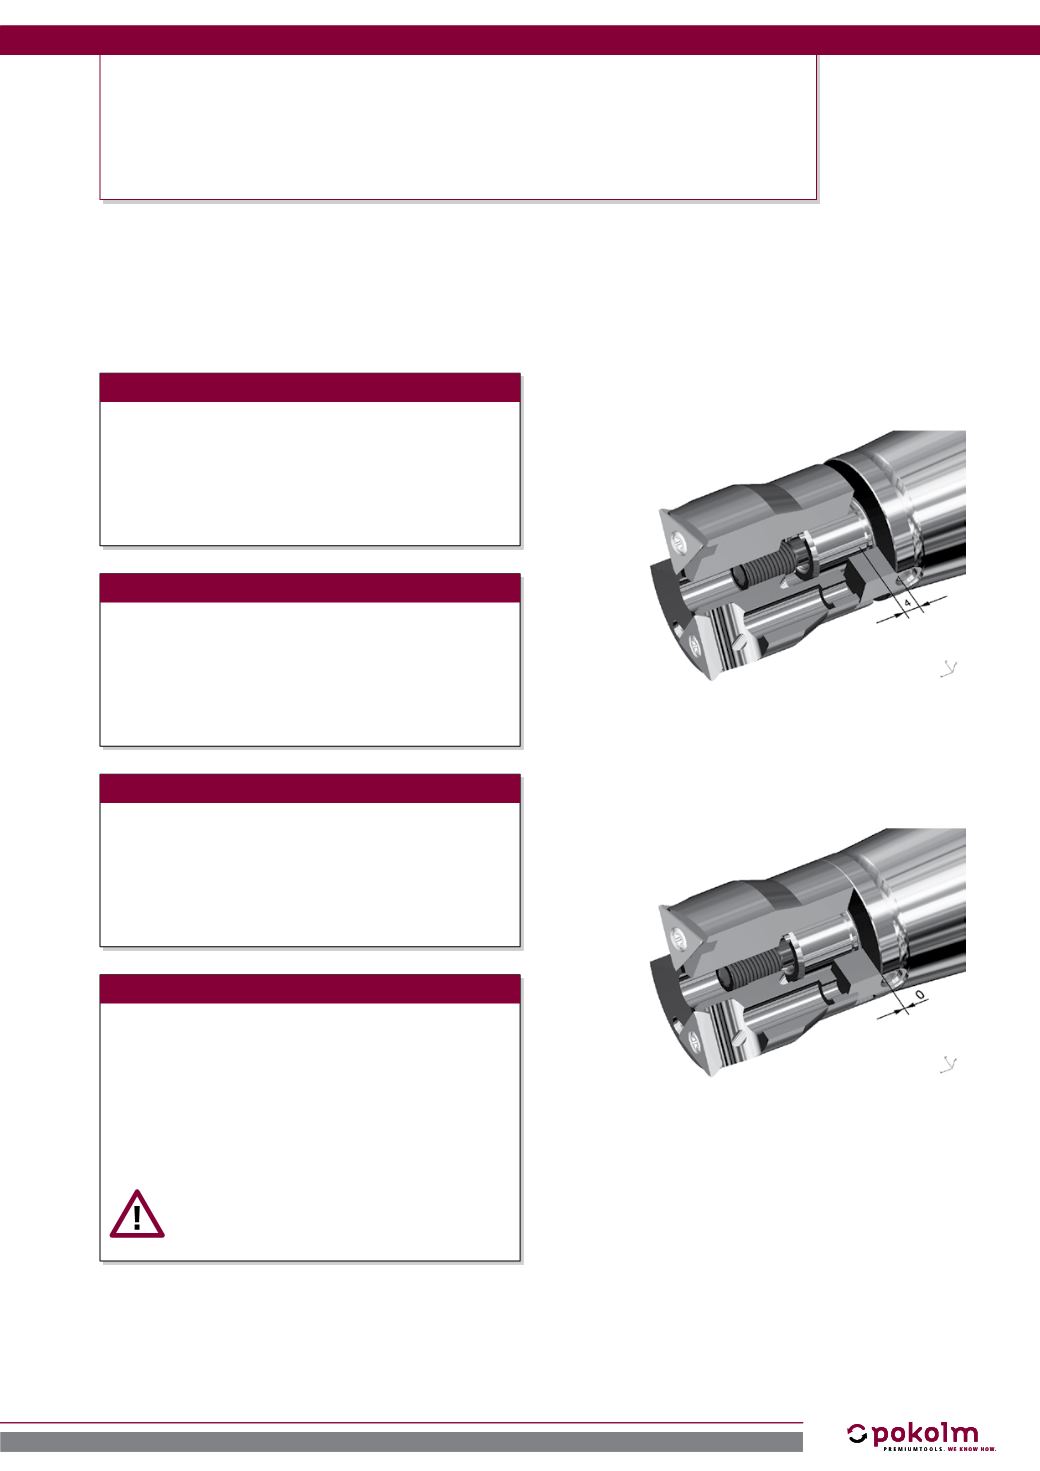
For assembling, put milling cutter body on to arbor.
Make sure, there is a remaining gap of 4 mm between
milling cutter body and arbor. (this is guaranteed,
when using genuine Pokolm-arbors).
Now, please screw the set-screw into the arbor uni-
formly, until there is no remaining gap between arbor
and milling cutter body by using an Allen-key 4 mm
opening.
If, beyond expectations, a gap remains, please dis-
mantle your cutter body from the arbor . Unscrew the
set-screw by ½ revolution . Continue with step 2.
Please consider:
Maximum torque = 10 Nm
If you have any further question regarding milling systems with set-screw please do not hesitate to contact us.
Step 1 and 2
Step 3 and 4
219
Assembling instructions - Mirrorworx® and Baseworx®


