ASSEMBLING INSTRUCTIONS
for Milling cutter bodies with round inserts and shim
In order to maintain optimum and safe use of these tools, you should pay attention to following notice:
Assembling Indexable Inserts
Replace Shim
Step 1.1
Step 1.2
Step 1.3
Step 2.1
Step 2.2
Step 2.3
Step 2.4
Step 2.5
Remove Torx-screw (5) from cutter body (1) with
Torx-screwdriver (7) and check correct fit of threaded bush
(3) in threaded bore (A), using provided Allen-key (4).
Pay attention, that the shoulder of the threaded bush
(3) sinks completely into the recess of the shim (2). If
not, please fix it with the Allen-key (4).
Assemble indexable inserts (8) first by means of Torx-
screw (5), using Torx-screwdriver (7) and fasten finally
with the locking screw (6) in threaded bore (B).
For replacing shim, please prepare for Torx-screwdriver
(7) and Allen-key (4).
Unscrew locking screw (6) in threaded bore (B)
and after that Torx-screws (5) fixing inserts (8) with
Torx-screwdriver (7).
Using Allen-key (4), unscrew and remove threaded
bush (3) from threaded bore (A). Remove shim (2)
from cutter body (1). Clean insert seat from swarf and
grease, before you put new shims back to cutter body.
Put new shims (2) into insert seats and fix it into threa-
ded bore (A) with threaded bush (3) using Allen-key
(4) and copper paste from our accessories selection.
Pay attention, that the shoulder of the threaded bush
(3) sinks completely into the recess of the shims (2).
Now, indexable inserts (8) can be fixed as usually,
using Torx-screws (5) and Torx-screwdriver (7). Finally,
fasten locking screw (6) for secure insert fixing into
threaded bore (B).
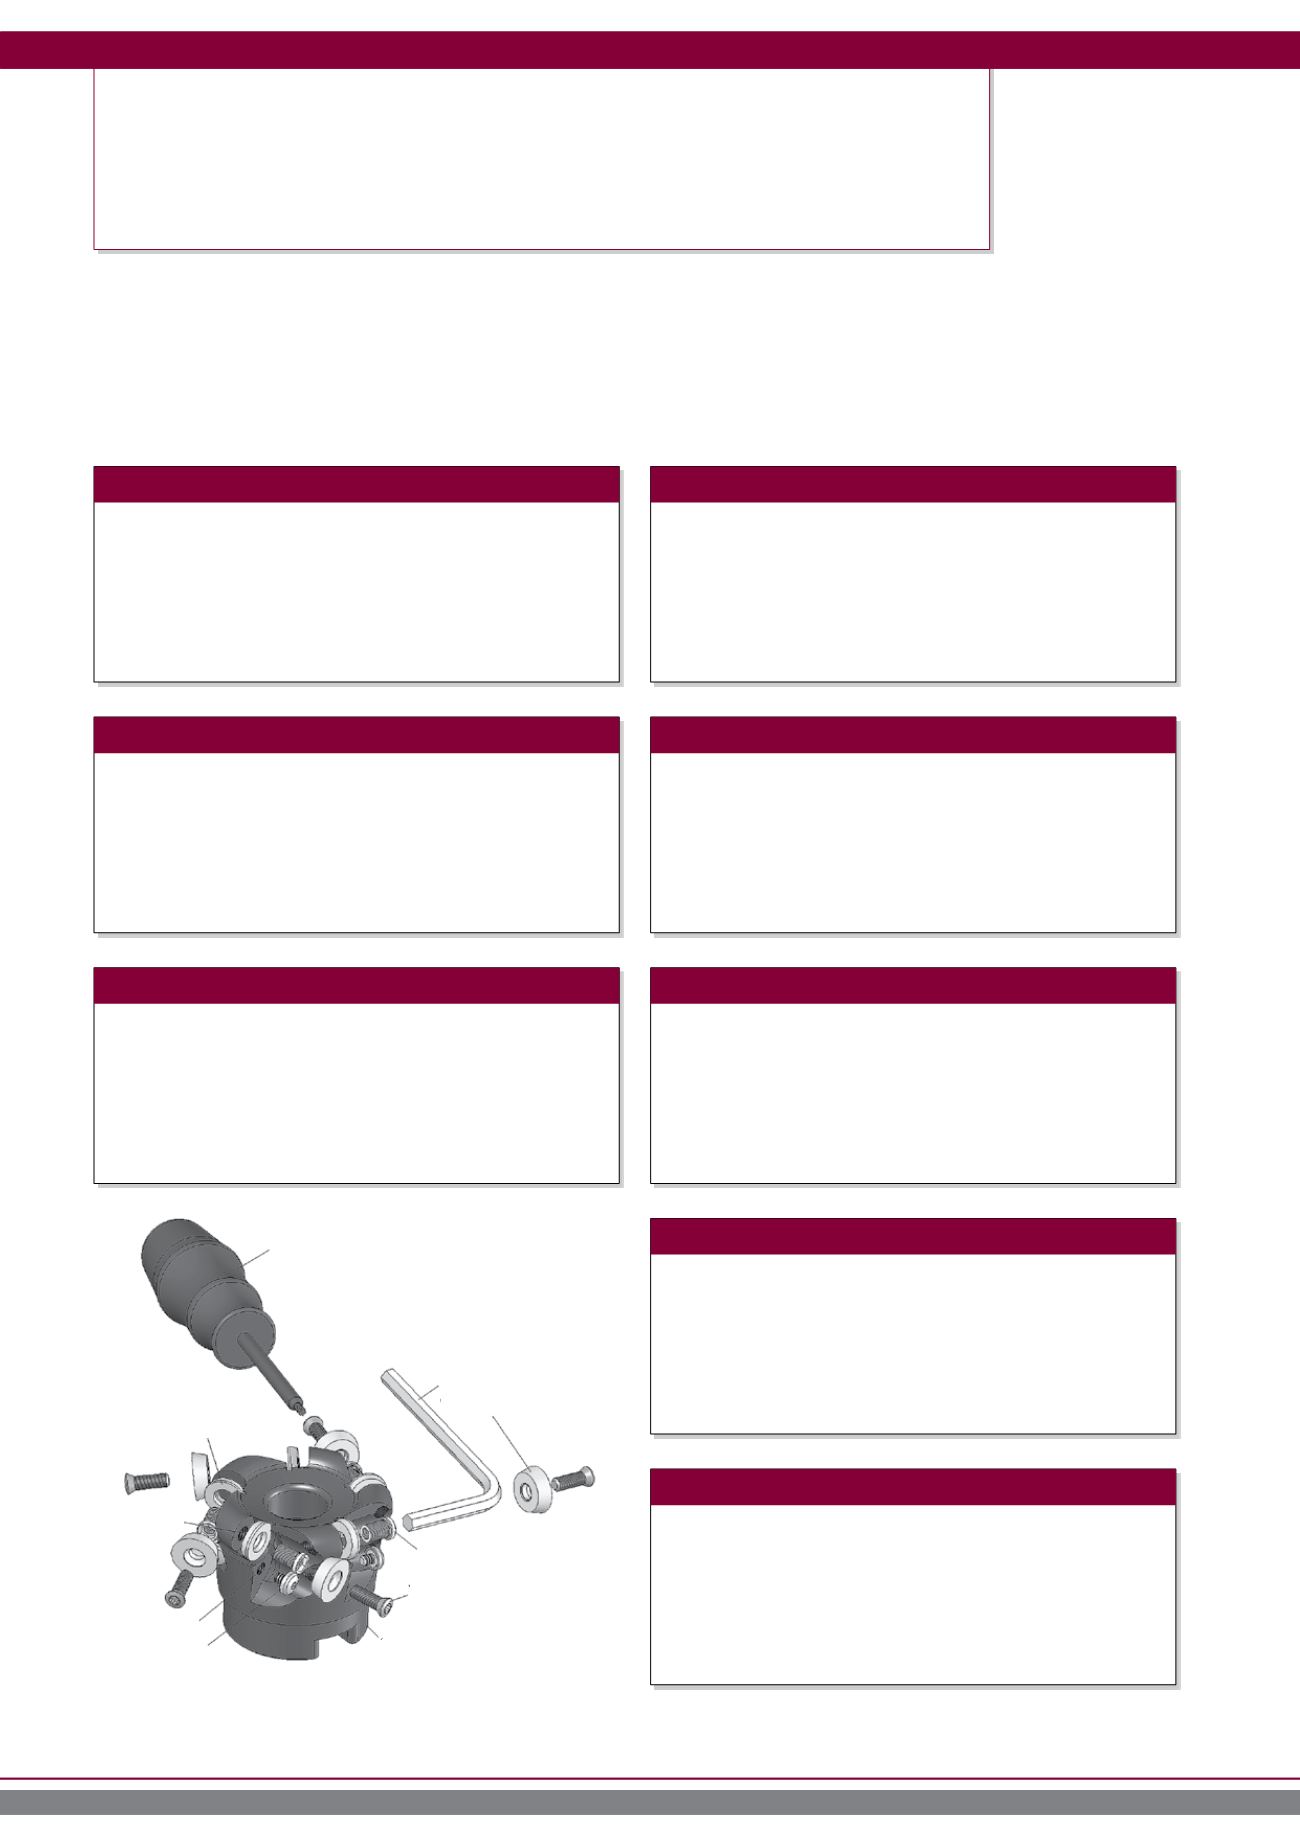
Indexable Inserts (8)
Bore A
Bore B
locking screw (6)
Cutter body (1)
Torx screw (5)
Threaded bush (3)
Inbus (4)
Torx-srewdriver (7)
Shim (2)
Assembling instructions
218


